> ## Documentation Index
> Fetch the complete documentation index at: https://upstash-redis-1-18.mintlify.site/llms.txt
> Use this file to discover all available pages before exploring further.
# n8n with QStash
Leverage your n8n workflow with Upstash Qstash, here is how you can make those requests using HTTP Request node.
### Step 1: Set Up an n8n Project
1. Go to [https://n8n.io](https://n8n.io) and create a new project
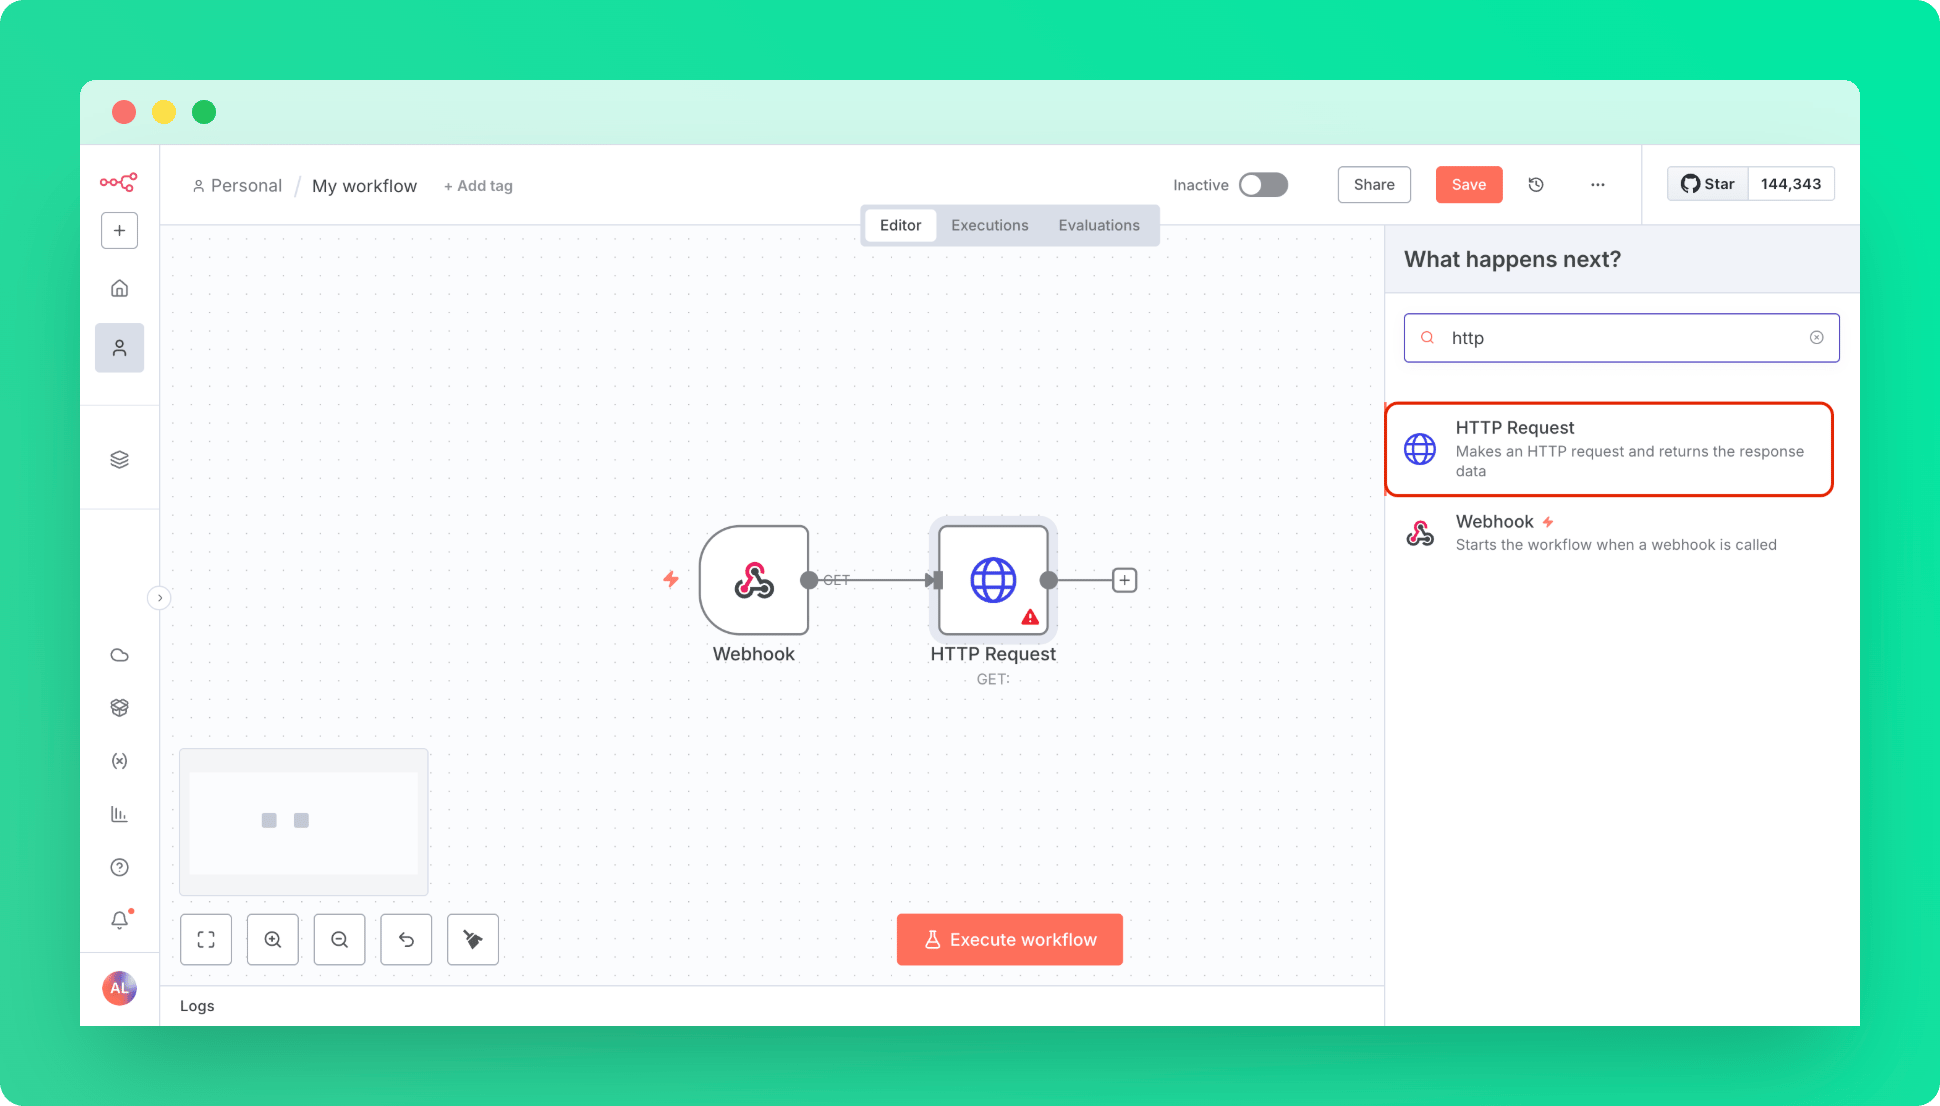
2. Create a Trigger as Webhook with default settings, this will be our entry point.
3. Create a HTTP Request Node
 ***
### Step 2: Import QStash Configurations to HTTP Node
1. Go to Upstash Console and open QStash Request Builder Tab.
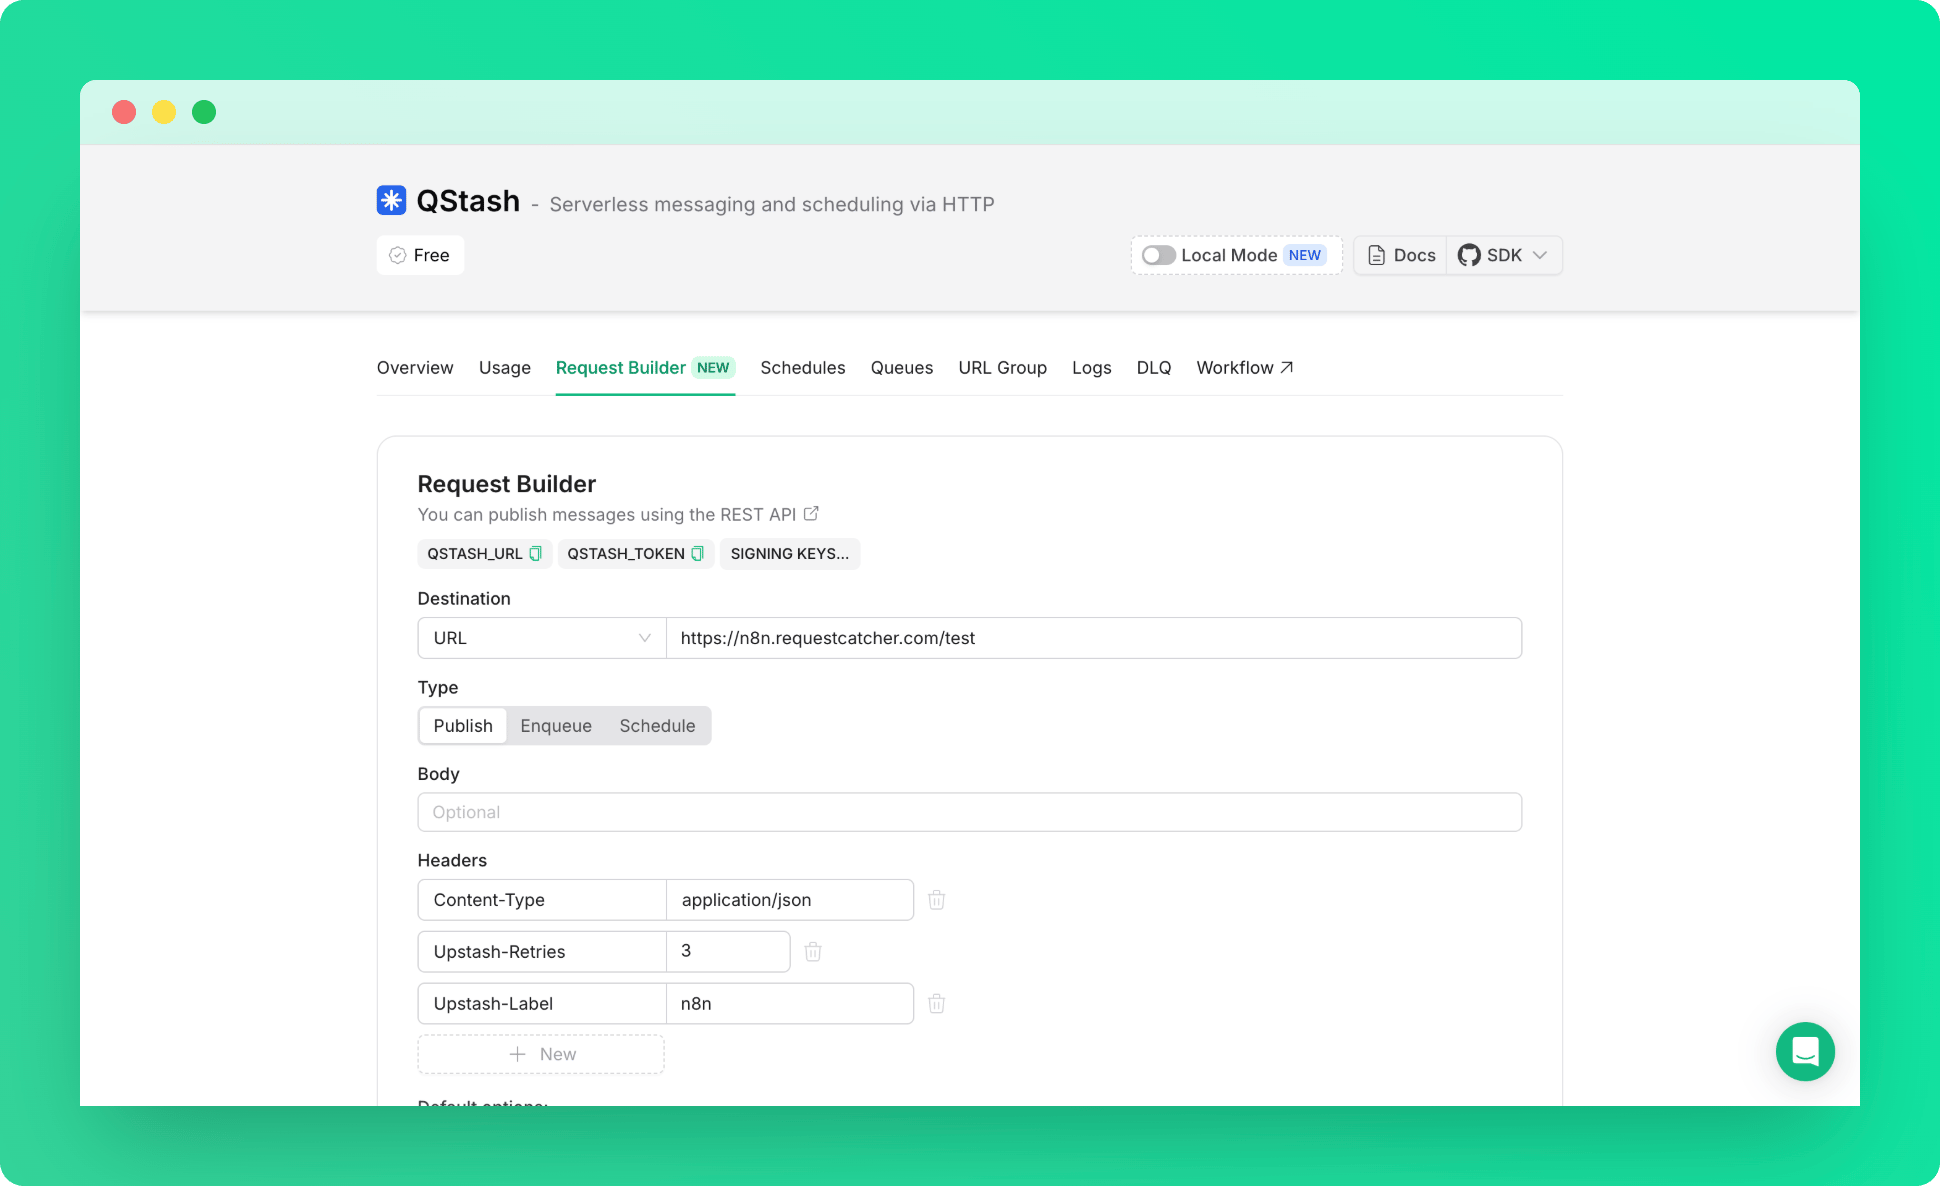
2. Fill out the fields to create an QStash Request. (Publish, Enqueue, Schedule)
***
### Step 2: Import QStash Configurations to HTTP Node
1. Go to Upstash Console and open QStash Request Builder Tab.
2. Fill out the fields to create an QStash Request. (Publish, Enqueue, Schedule)
 3. Copy the cURL snippet created for you, representing your request.
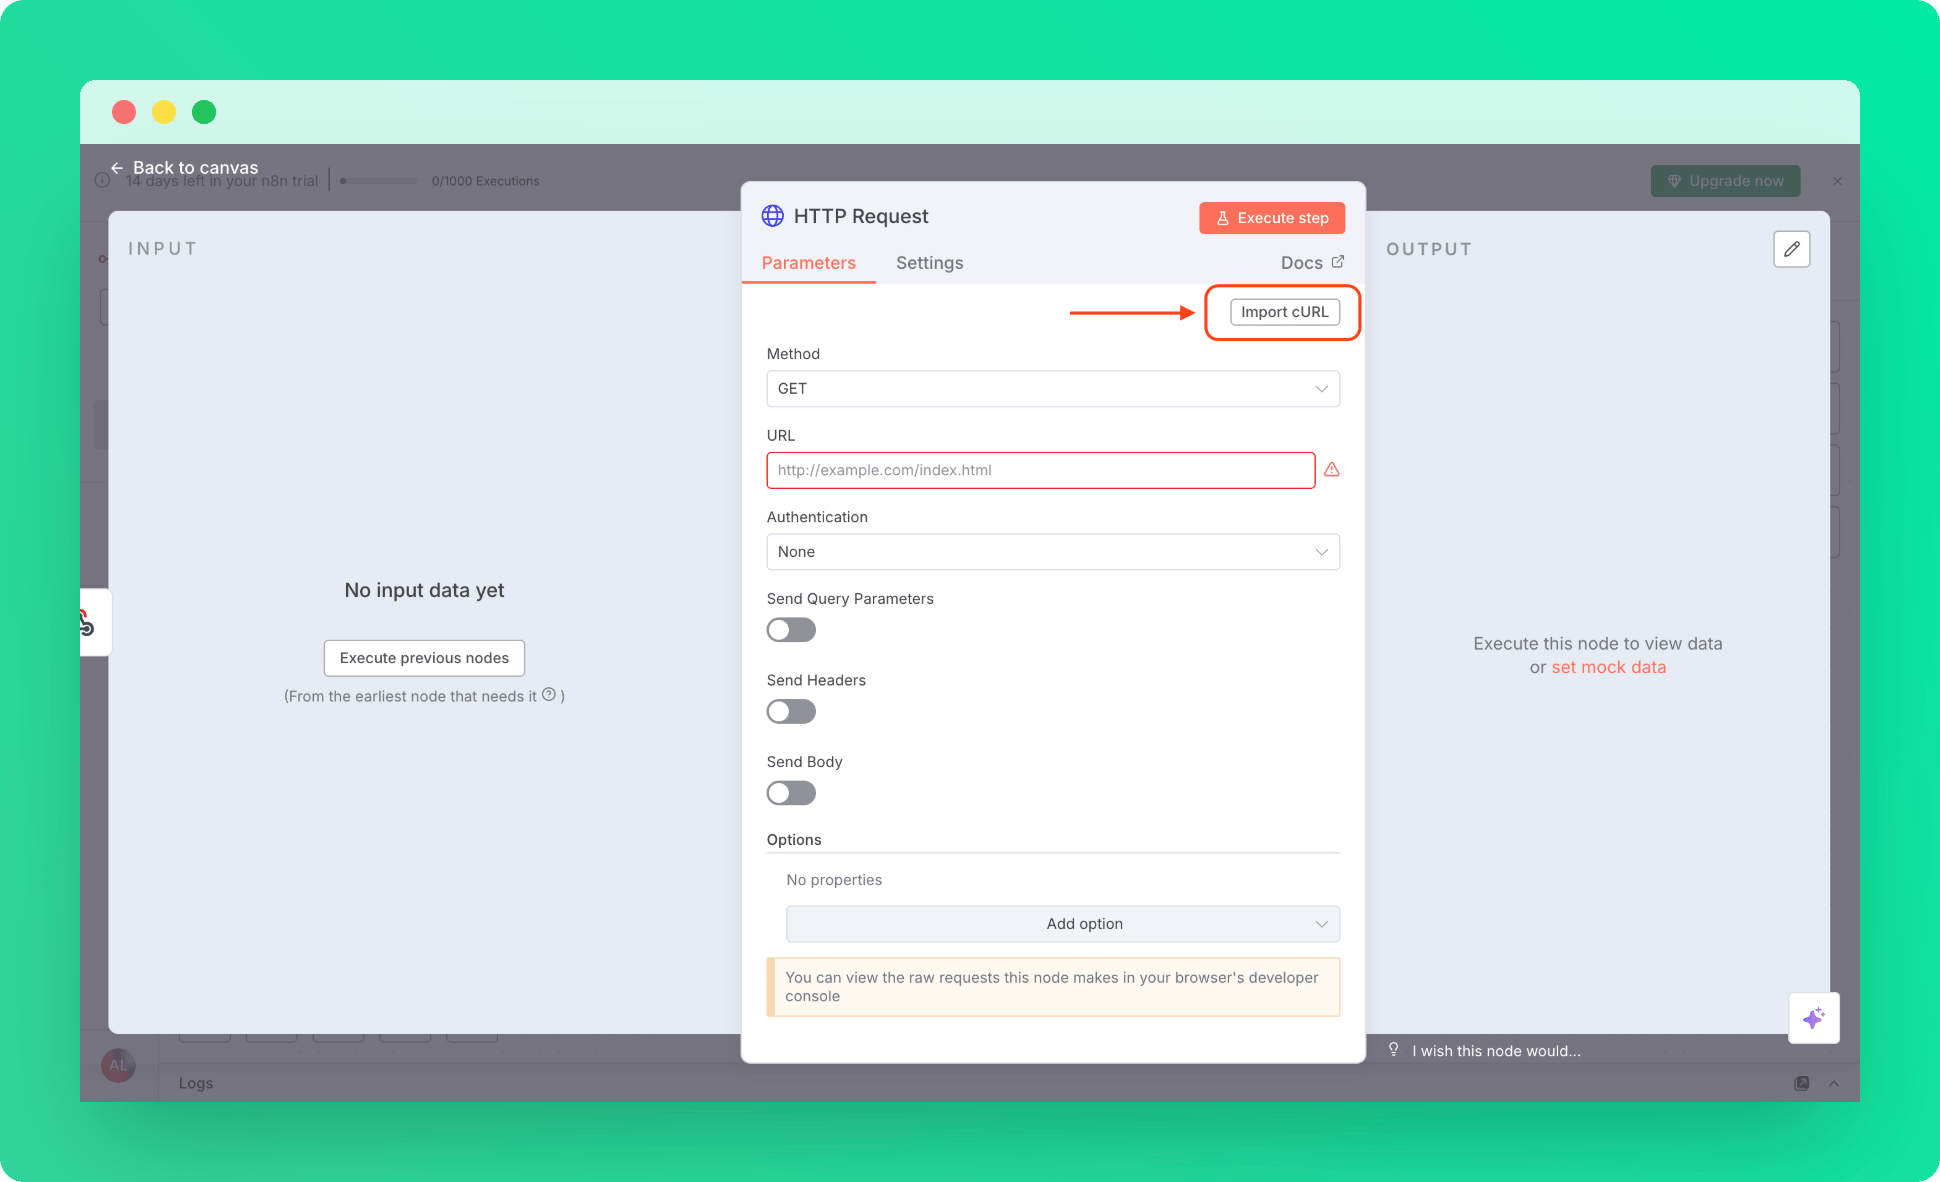
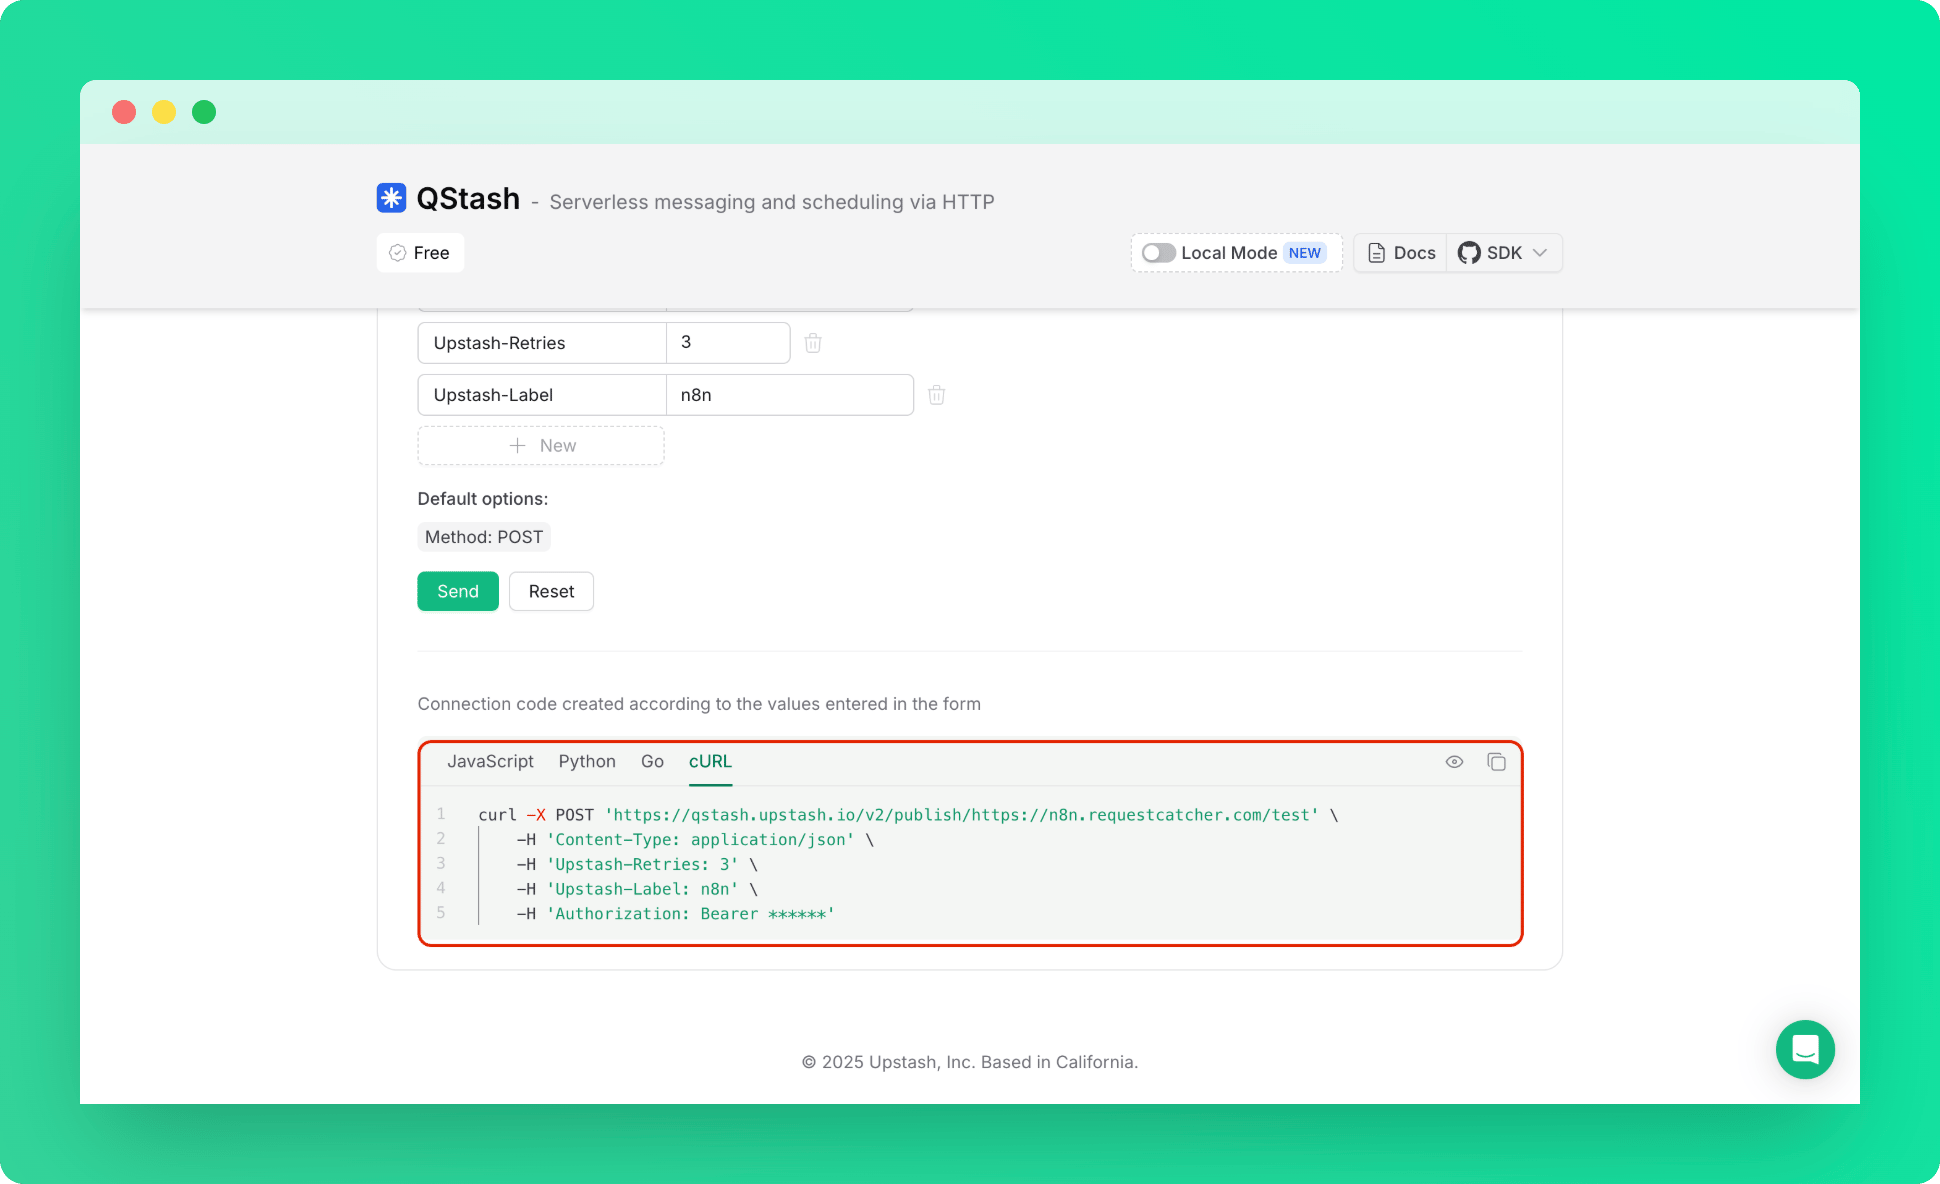 4. Back to the n8n, in HTTP Request Parameters tab, use import cURL.
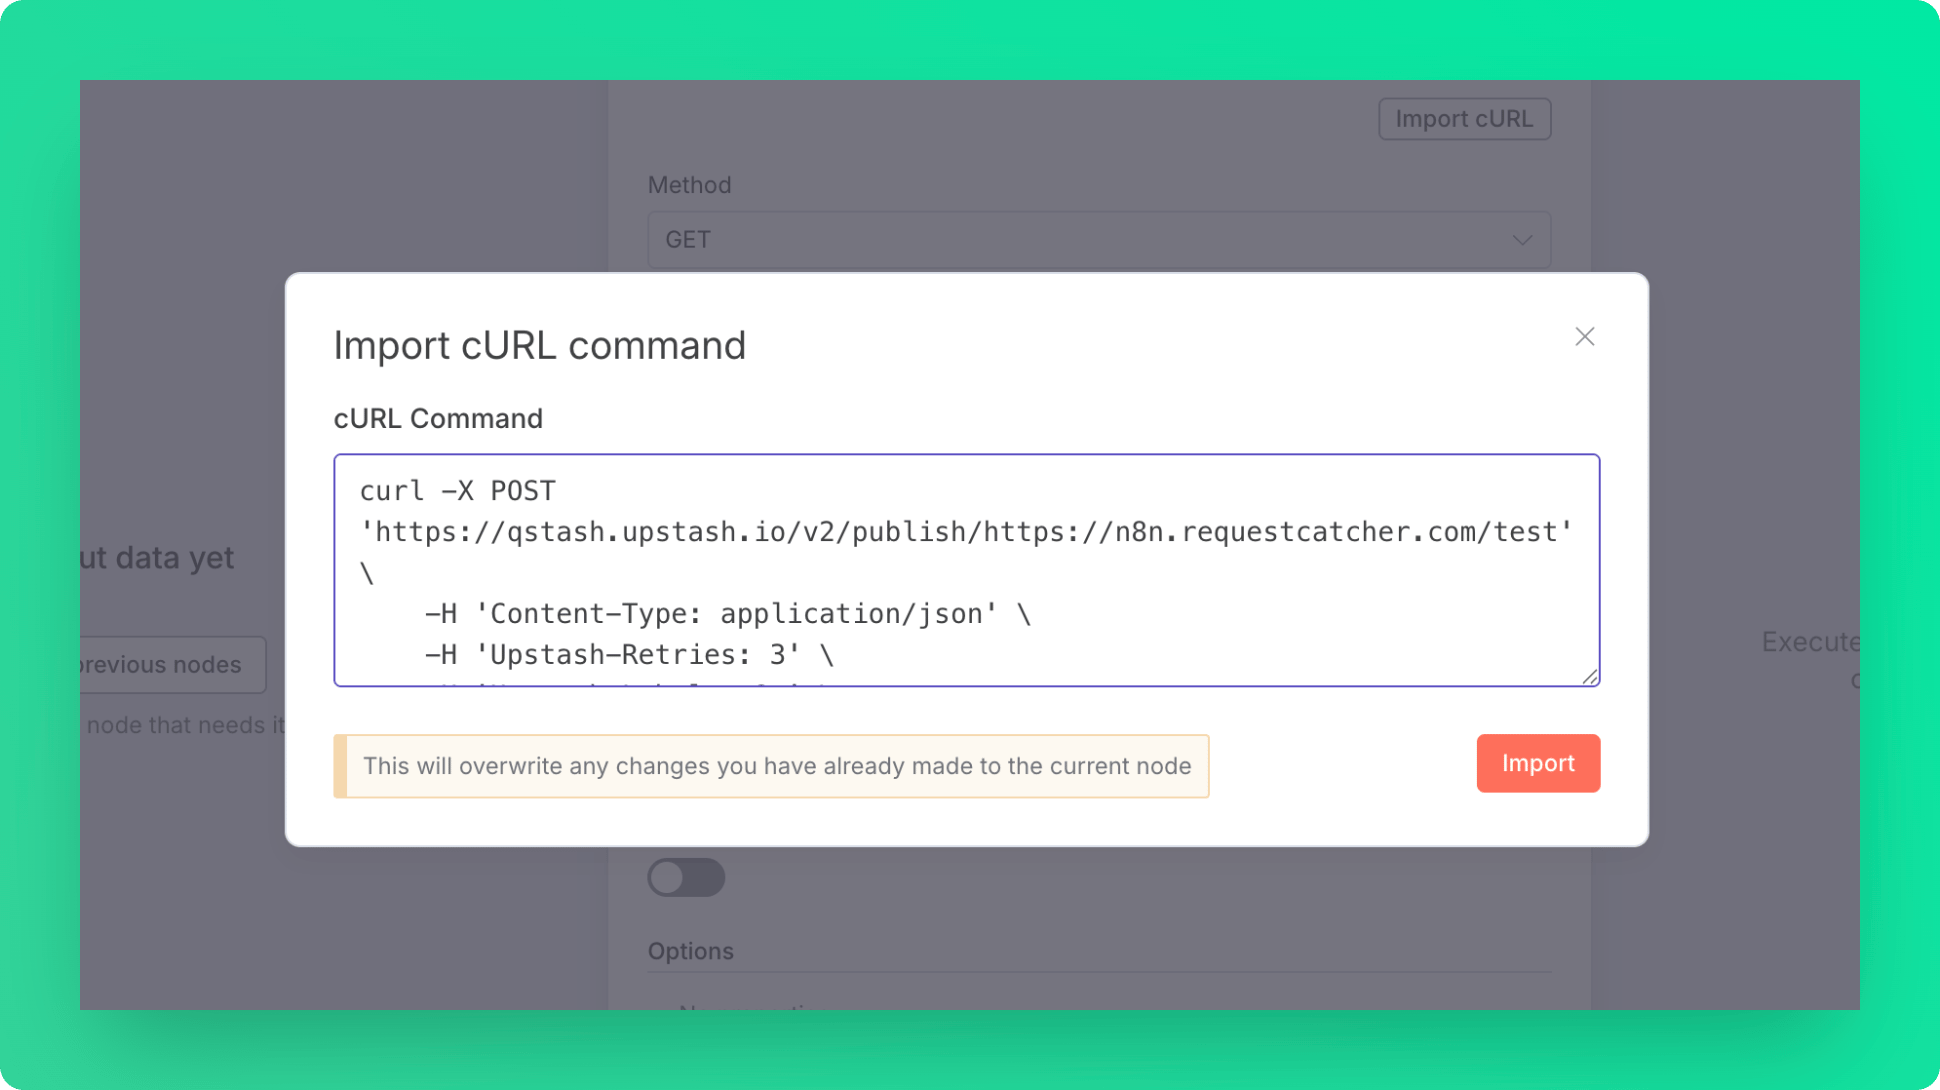
 5. Paste the cURL snippet that you copied in the console, and let n8n to fill out the form for you.
 ***
### Step 3: Test the Workflow
1. Execute workflow.
2. Visit the Webhook URL.
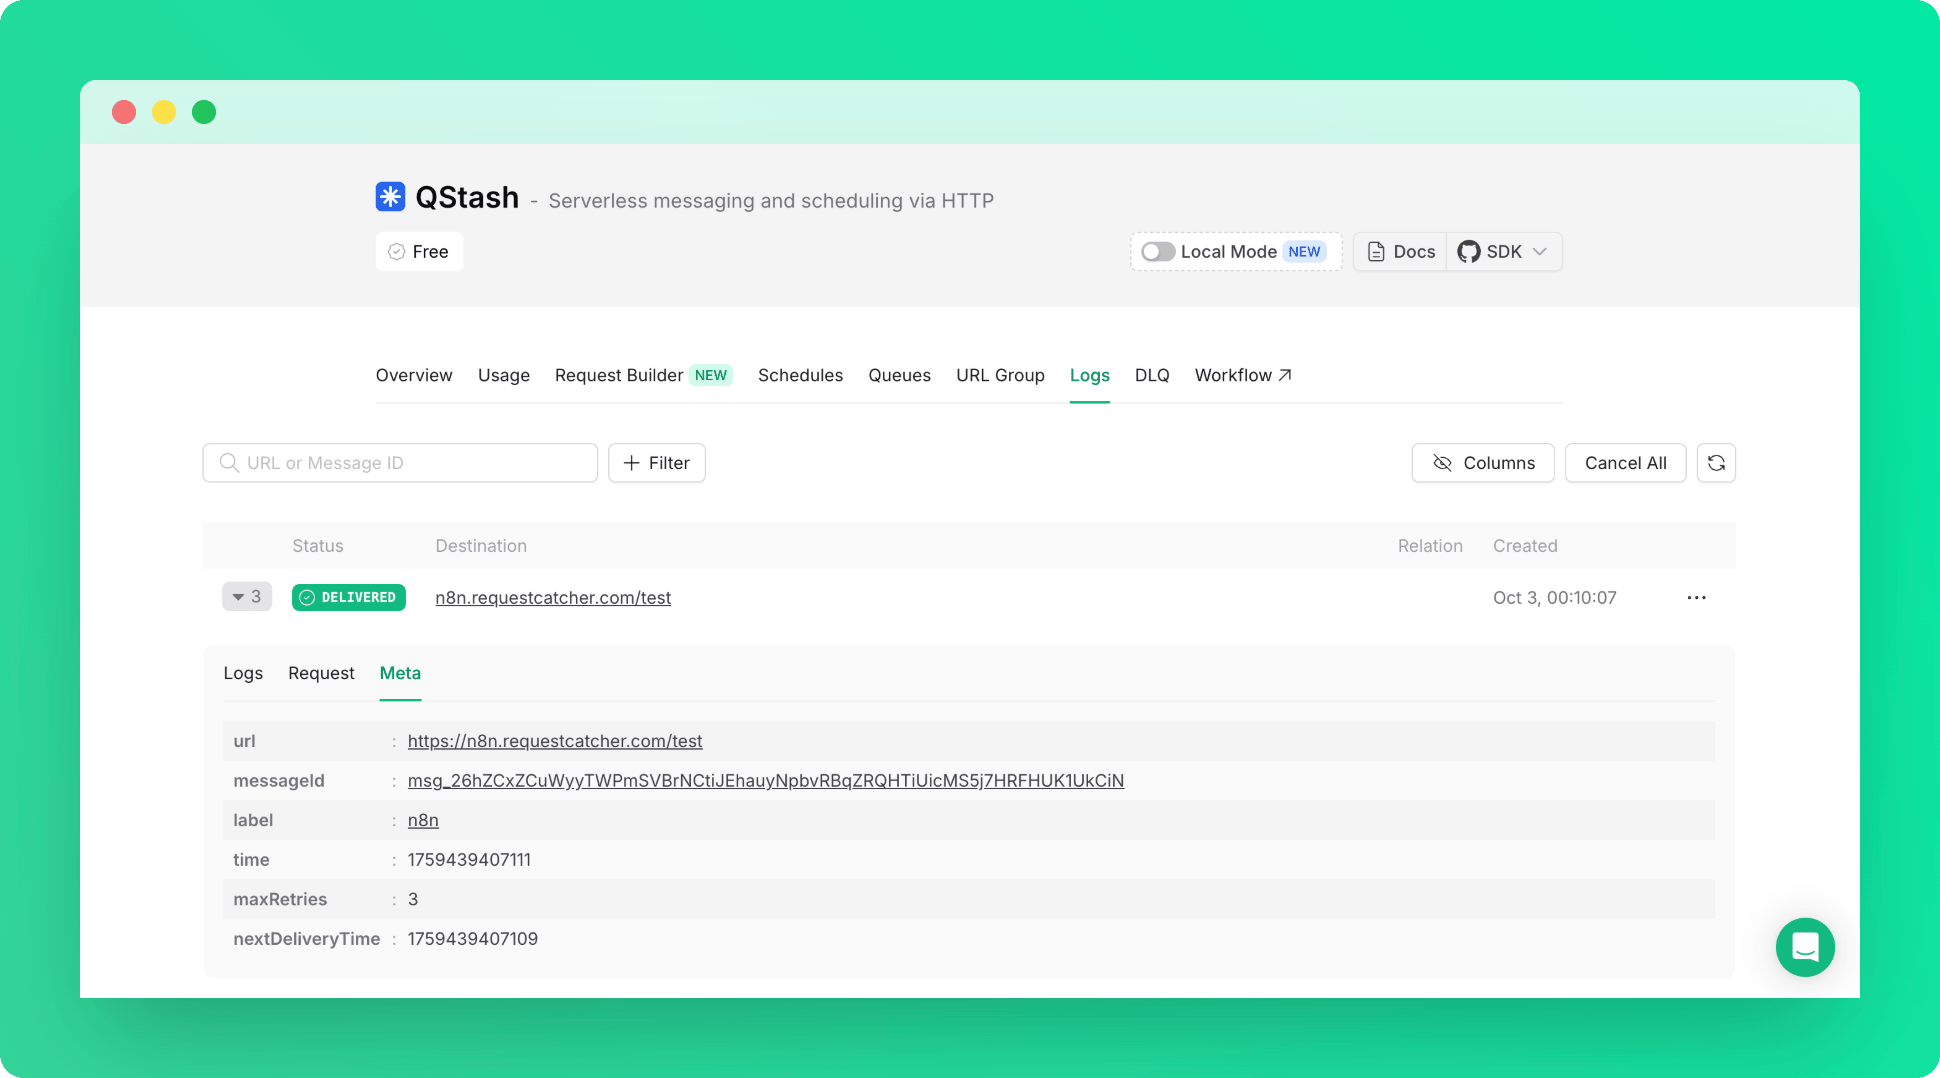
3. That's it! You can check the logs in the Qstash Console to confirm your QStash Request is working.
***
### Step 3: Test the Workflow
1. Execute workflow.
2. Visit the Webhook URL.
3. That's it! You can check the logs in the Qstash Console to confirm your QStash Request is working.